How to do it…
Now that we have discussed the basics, we can leave behind all the boring parts and get to the action. It is time to play and learn!
One of the first things we can do is determine the currently loaded kernel in our system. The following command will display all kernels that are installed and configured within our Linux system (please run as root):
# grubby -–info=ALL
Here is one example of the output:
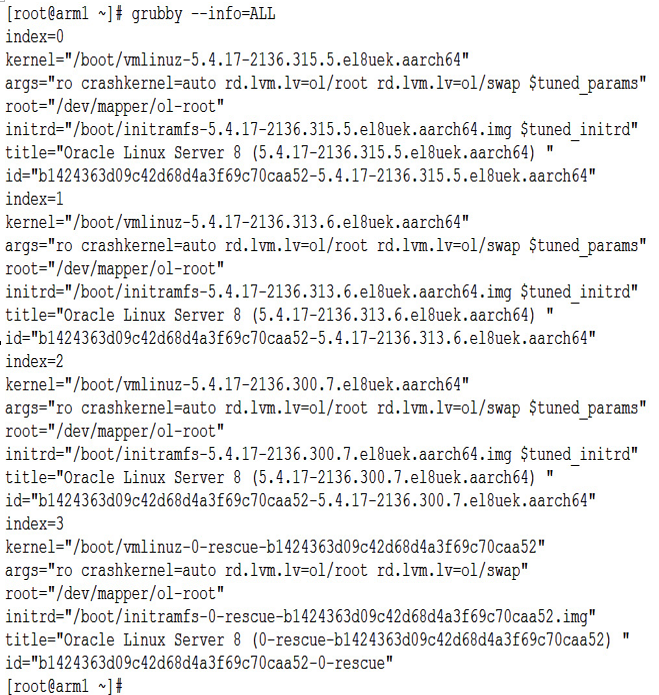
Figure 3.1 – grubby output
Note
The sample is done using an Arm system, hence the aarch64 suffix. x86_64 systems will show x86_64 suffixes.
We can also determine the default kernel in use by executing the following command:
#grubby -–info=DEFAULT
Here is one example of an output:

Figure 3.2 – grubby default kernel
We can configure a specific kernel to be used as the default boot kernel by running the following command:
#grubby –-set-default <Kernel>
Here is one example of using the preceding command to change the default kernel in use. Knowing that RHCK is going to be a version 4 kernel, we will use 4.18.0-425.13.1.el8_7.x86_64. Next, we need to point to the file in /boot, adding vmlinuz- to the name.
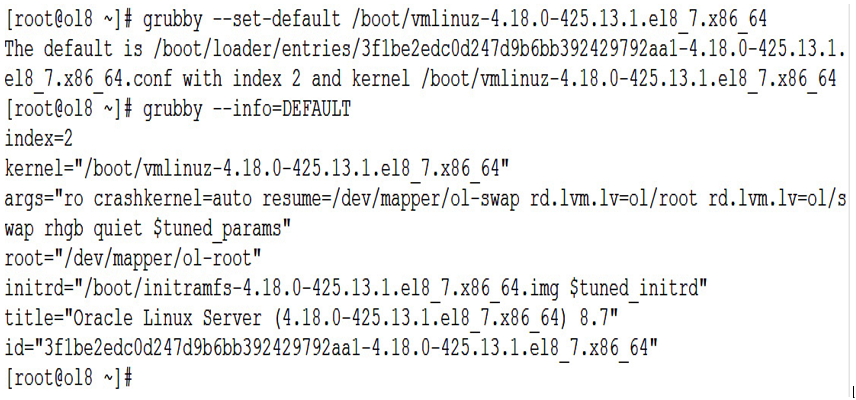
Figure 3.3 – Changing the default kernel with grubby
Another possible use of the grubby command is to use it to update a kernel configuration entry or to add or remove boot arguments that should be passed to the kernel by default; the following is one example of it. But first, we will show all the information about a specific kernel in the system:
[root@ol8 # grubby –info=/boot/vmlinuz-0-rescue-c32316cc4b5241b8adb312707ae46458
This will show the details for the specified kernel, including the patch to the kernel and any arguments:
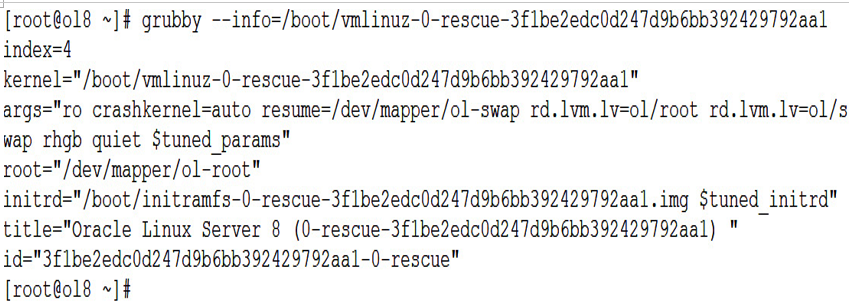
Figure 3.4 – grubby kernel info
With these kernel details, we remove the rhgb quiet configuration from the kernel arguments and add a new test by using the following command:
grubby –remove-args=”rhgb quiet” –args=test –update-kernel /boot/vmlinuz-0-rescue-3f1be2edc0d247d9b6bb392429792aa1
As you can see, we used the kernel name to update the arguments on that kernel (we used the –-remove-args attribute to remove an argument configuration and the –args attribute to add a new one). Now, we can check whether the argument’s structure changed by running the grubby –-info=$BOOTENV command with the boot environment as seen in the following figure.
Note that you can always use the man grubby command to review all the options available within the grubby command:

Figure 3.5 – grubby info after making the change
How it works…
As mentioned before, Oracle Linux comes with two flavors of kernels: the UEK, which is Oracle’s default flavor of Linux kernel, and the RHCK, which is compatible with the RHEL kernel. Regardless of what kernel is used, the rest of the operating system is the same; that is, it has the same applications, libraries, and file locations.
This section will teach you how to switch the default kernel (UEK) to the RHCK and vice versa. So, let’s get started.
First, once again, we will use the grubby command to check the default kernel in use and, again, to check all kernels available within your system by using the grubby -–info=DEFAULT and grubby –-info=ALL commands. The difference between the two commands is with the DEFAULT option, only the booting info is shown. With the ALL option, all available kernels are shown:
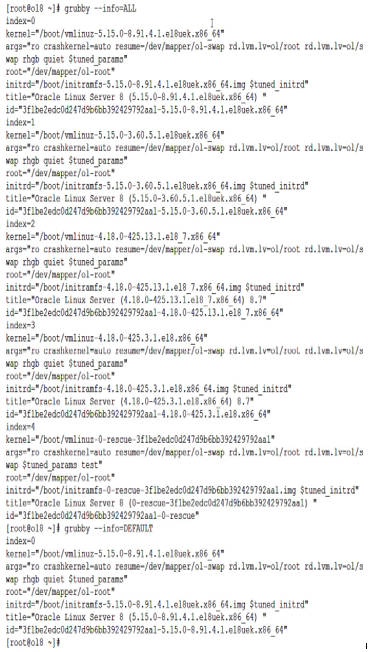
Figure 3.6 – Kernel version before swapping to RHCK
In the preceding example, you can see that, in this case, the default kernel in use is /boot/vmlinuz-5.15.0-8.91.4.1.el8uek.x86_64, which is a UEK flavor of the kernel. A UEK system should always have uek after el#. You can also check the current kernel using the uname -a command:

Figure 3.7 – uname -a before swapping to the RHCK
To check all the kernels available on the system, we could use the data from the previously run grubby –info command, or use the rpm -qa kernel*core* command:

Figure 3.8 – Checking the kernels using the rpm command
When checking all available kernels, we can quickly identify two versions of the UEK and two versions of the RHCK. For this example, we will use the RHCK version called 4.18.0-425.13.1.el8_7, which is found in boot at /boot/vmlinuz- 4.18.0-425.13.1.el8_7. So now, let’s use the grubby –-set-default command to make the selected RHCK the new default. We then check the default kernel using the grubby –info=DEFAULT command:
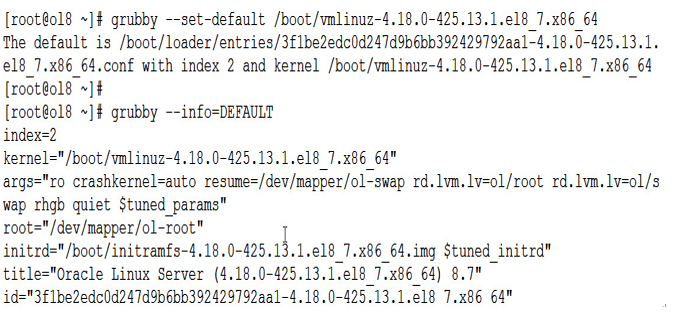
Figure 3.9 – Switching to the RHCK
And that’s it. Now all we need to do is reboot the system to reflect the kernel change. Then, if you want to switch it back to the previous RHCK flavor of the kernel, all you need to do is run the grubby –-set-default command again, but this time specify the name of the RHCK version that you want.