Setting up the web server – HTTPD
The next step for the PXE server is to install a web server. In this example, we will use Apache. Other web servers will also work, but Apache is one of the most common.
Getting ready
To set up an HTTP server, you will need an Oracle Linux 8 VM running in your environment. The server’s IP address should be routable to the subnets the VMs are using, and the firewall ports should allow HTTP/HTTPS traffic. Ideally, you should also have enough space for several ISO files. Normally, 20-30 GB is enough data space.
How to do it…
Starting the install of the Apache HTTPD server is simple; just run yum install -y httpd.
Once the web server is installed, copy the full ISO file to the server into a directory of your choice. In our example, OracleLinux-R8-U5-x86_64-dvd.iso is copied into /root, as seen in Figure 2.9.

Figure 2.9 – Oracle Linux ISO in /root
The next step is to mount the ISO file in a directory under docroot. With the standard install of Apache, docroot is in /var/www/html, so a directory named OL8 is created. When the ISO is mounted, it is more efficient to use a loopback mount method. This allows an ISO file to be mounted as a normal filesystem. Next, using a loopback mount, mount the ISO file using /var/www/html/OL8 as the mount point using the following command:
mount -o ro,loop /root/OracleLinux-R8-U5-x86_64-dvd.iso /var/www/html/OL8
Once mounted, a df command will show the mounted filesystem. The entire chain of commands can be seen in the following screenshot, Figure 2.10.

Figure 2.10 – ISO mounted
Now that the filesystem is mounted, let’s open up ports 80 and 443 in the firewall. This is easily done with firewall-cmd, adding both the http and https ports opened and saved as permanent changes to the firewall. Once the ports are opened, the firewall rules are reloaded. The following three commands are run to perform these tasks:
firewall-cmd –add-service=http –permanent
firewall-cmd –add-service=https –permanent
firewall-cmd –reload
Now that the firewall is opened, Apache is installed, and the ISO is mounted via a loopback, we can start the Apache server with the systemctl start httpd command.
You can verify that all is working as expected by pointing your browser to the server’s IP address and the OL8 directory, as seen in the following screenshot. This will show the contents of the ISO, including the release notes and the RPMs under the BaseOS directory, as seen in Figure 2.11.
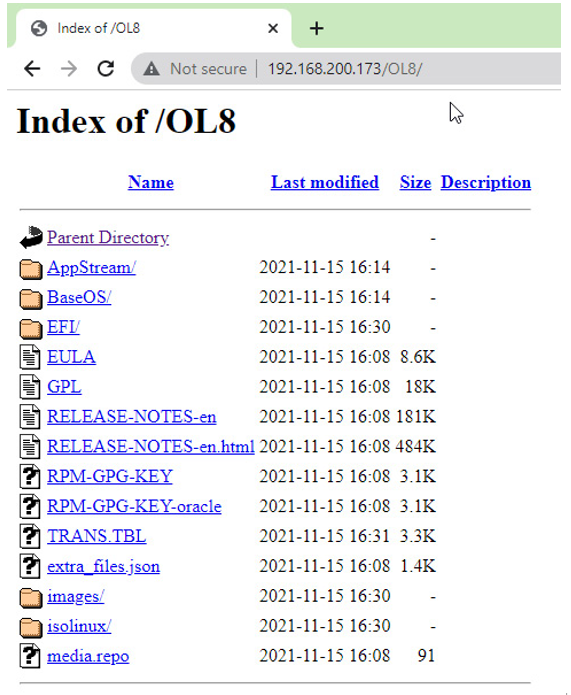
Figure 2.11 – ISO file accessible via httpd