Back in the day – a manual installation
Automated installations are great, but for some admins, the complexity of configuring and maintaining the infrastructure to support an automated installation is more effort than doing a manual installation. This recipe will go over how the manual installation works.
Getting ready
To do this, you will need a system to install from. In the example, Oracle VM VirtualBox will be used, but it could just as easily be on a bare-metal server or a different hypervisor. You will also need installation media. Normally, an ISO works fine, but you can also use a boot ISO and an HTTP server, an FTP server, or even a network file share.
How to do it…
Regardless of whether you boot from an ISO, a USB stick, or even a kickstart file with a graphical installation option set, the process is the same!
If you are booting from a boot-only image, you will need to enable the network and then point to an installation source. This is shown in the next few steps. If you are installing from an ISO or USB, skip to the How it works… section:
- When booting from a boot image, you will need to select Install Oracle Linux X to start the process. When possible, use the latest version of Oracle Linux. When doing an installation you will get the first screen where you can test the boot image or continue:
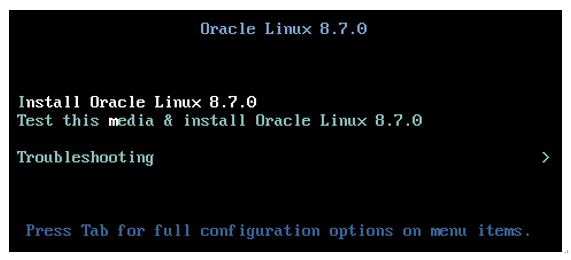
Figure 2.15 – Linux installer boot
2. Next, pick your language:
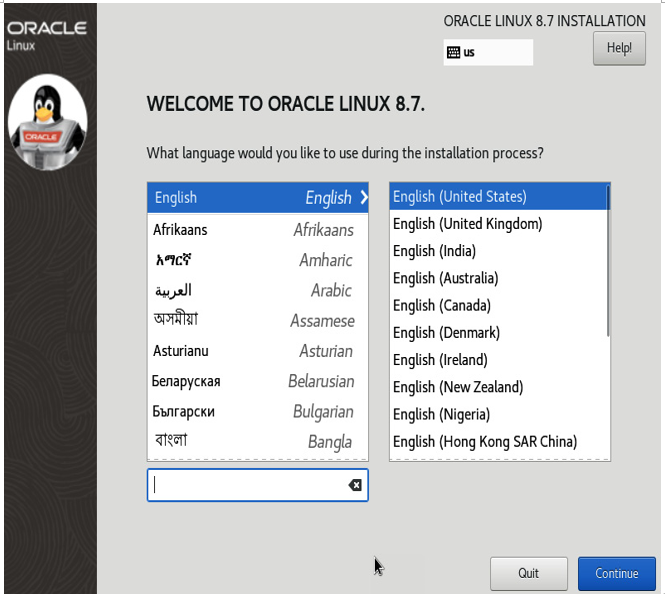
Figure 2.16 – Install language
3. Click on Continue once you have picked your language. Next, you should see the INSTALLATION SUMMARY section:
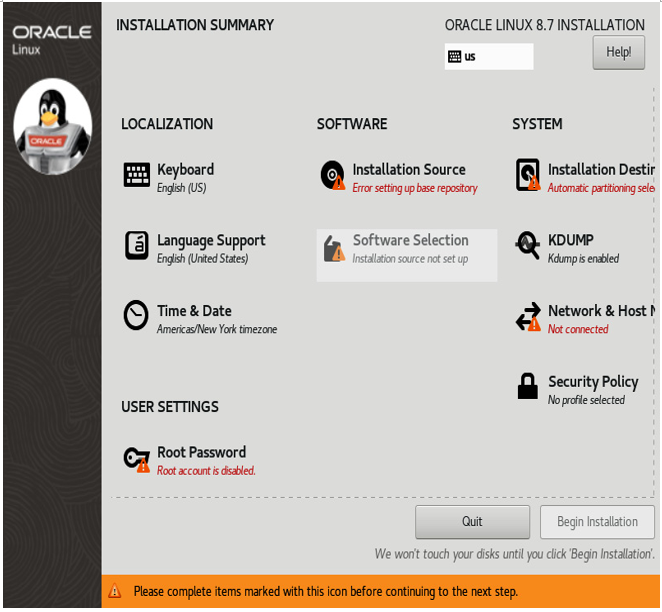
Figure 2.17 – Installation Summary
For now, we need to do two tasks:
- Enable the network
- Set Installation Source to Oracle’s yum repo
To enable the network, click on the Network & Host Name option.
5. Here, you will need to switch Ethernet on, and also update the hostname with the name of the server. The network will automatically use DHCP to configure the boot image. You can optionally manually configure the IP stack by clicking the Configure option.
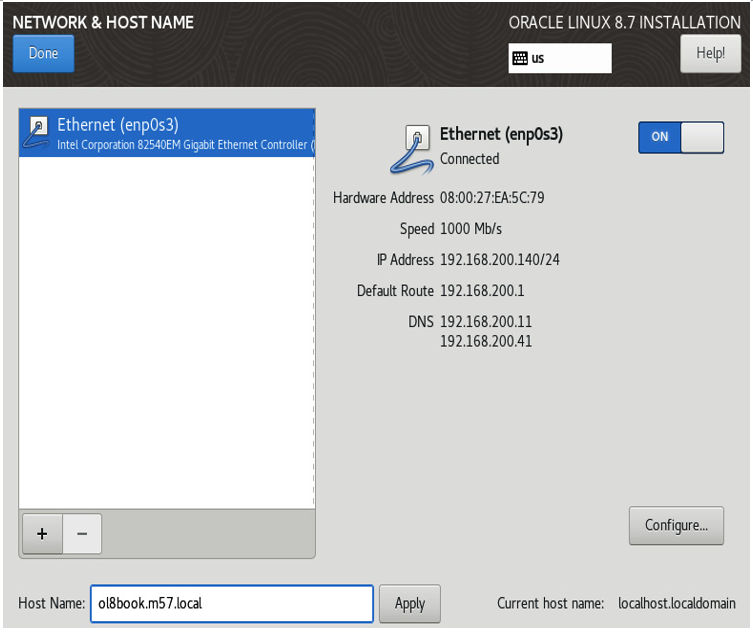
Figure 2.18 – Network & Host Name
5. Next, click Apply and then Done. This will take you back to the INSTALLATION SUMMARY page. From there, we will need to select Installation Source to set where we will get the install files.
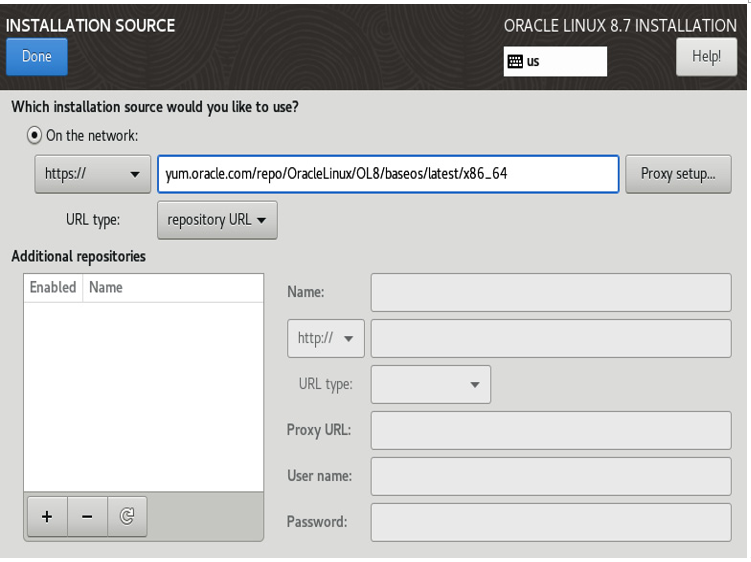
Figure 2.19 – Installation Source
In this example, we are using the Oracle Public YUM server as the installation source. You can optionally add additional repositories if needed, as well as set any proxy settings if required. You can also set an FTP:// patch for an NFS server path. Once you have a path, select Done.
6. This will take you back to the INSTALLATION SUMMARY page. Wait a few minutes for the repo index to load. Once it loads, you should see the Installation Source option, as well as the option for Software Selection.
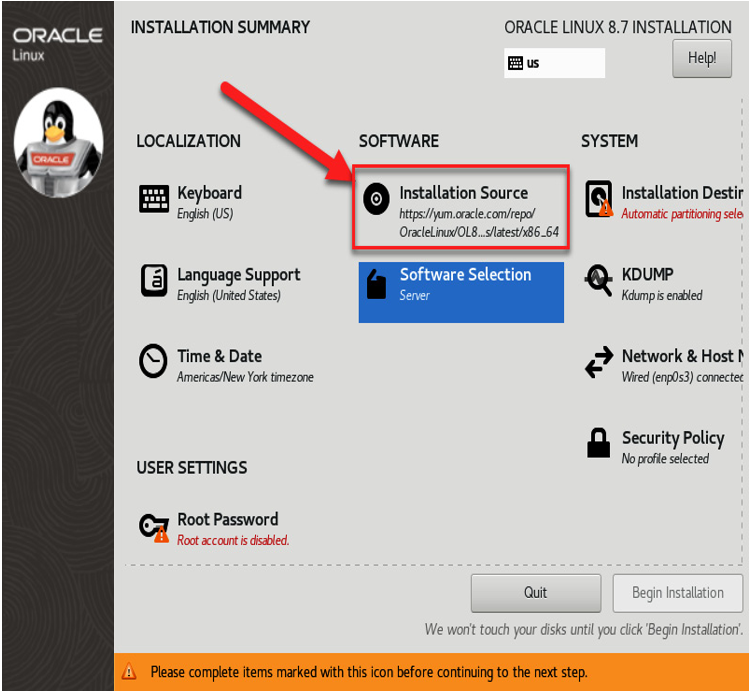
Figure 2.20 – Selecting Installation Source
Manually network booting is otherwise the same as an ISO or USB boot.